Menu
Menu
Website by ThierryD
rienquepourlesyeux@free.fr
Copyright 2010-2015
All rights reserved
Reproduction prohibited
Last update : 2021/03/11
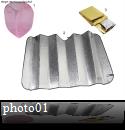
I suggest you do two photographic reflectors with a silver side and a gold side,
for less than 10 dollars. The purchase of necessary equipment can produce two reflectors,
but if you need only one, the rest of your equipment may be used for something else.
To manufacture these reflectors will require:
- A rigid frame like a laundry basket foldable (1 on photo01)
or car rear sunshade for children.
- A car sunshade for the windshield (2 on photo01).
- A survival blanket to have a gold coating (3 on photo01)
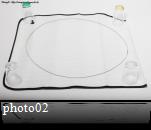
To begin, remove the metal frame rigid of the laundry basket foldable.
Halve the sun visor for the windshield of car.
Place a metal frame of the laundry basket foldable, on the half of the sunshade
as on the photo02.
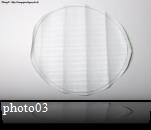
Cut the sun visor to the size of the metal, leaving 3 inches around as
on photo03.
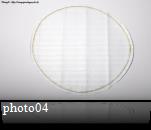
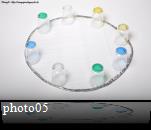
Paste the metal frame on the sun visor with neoprene glue (Chloroprene glue) like
the photo04, then fold the edge of 3 inches to completely cover the metal
as on photo05. To maintain the folding during drying glue, I used
glasses.
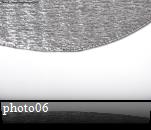
With time and manipulation, there is a risk that the sun visor comes off the metal frame
so I decided to take a needle and thread and sew together as shown on the photo06.
This operation is a bit long but will, in time, permit a good strength.
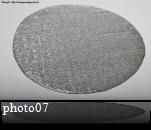
on the Photo07, you can see our front reflector silver finish. The surface is not a mirror,
it has many imperfections, this which is very good, this will give a soft, diffused light.
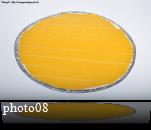
To fix the survival blanket, which will give the gold side,
I used double sided tape that I applied band like on the photo08.
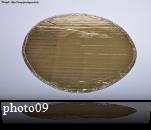
Cut a square of the survival blanket, slightly larger than the reflector.
Then remove the protections of double-sided tape to fix the survival blanket square.
When laying the survival blanket, some folds were formed, it does not matter,
this will be a light more homogeneous and less hard. Once the square of blanket is placed,
cut the survival blanket so that it no longer exceeds our reflector like on the photo09.
To show you the rendering of this reflector, I made 3 pictures:
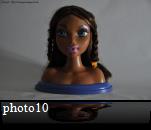
- The photo10 was taken with a light source on the right side without reflector.
It has strong shadows on the left side of the face of the doll.
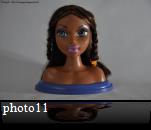
- The photo11 was taken with the silver reflective side of the reflector,
we see that the shadows are gone, light is homogeneous.
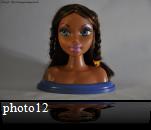
- The photo12 was taken with the gold reflective side of the reflector,
there are still fewer shadows, the color gold is warm.
The reflector was placed close enough to the doll, it was almost like a second source of light.
As you can see, the folds are not visible so do not panic if you also
made some small errors when you make it.
The photographic reflector is now ready, you can perform other various sizes and shapes.
To make smaller shapes, cut the metal frame. To make larger shapes, assemble
two or three metal frame, through the small fitting tube, that you can see right on photo03.
The cost price is 5 to 10 times less expensive than reflectors for rendering professional equivalent.
Copyright 2010 ThierryD - http://rienquepourlesyeux.free.fr
Last update 17/10/2010
Reproduction prohibited